Do you want to open your newly created Minecraft server to the public? Having a live Minecraft server can give you more opportunities to play with friends, and manage better.
To port forward your Minecraft server, you will need to have access to your router, and open port 25565 on your IPv4, which looks like 192.x.x.x
What is Port Forwarding for Minecraft Servers
Port forwarding for Minecraft servers is a process, which allows people to connect to your router’s address.
When you make a Minecraft server, you want players to be able to access it. For this to happen, you will need to open a port and assign an IP to it.
If a port is not open on a Minecraft server, only people who are connected to your network can join it. This is also known as a LAN server.
But if you want external users to join the server, you will have to open your port, which by default is 25565 for Minecraft servers.
If port 25565 is already taken, you can change the last number and it will still work.
How to Port Forward a Minecraft Server
To port forward a Minecraft server and open it for the public, you will need to follow an easy set of steps.
These steps are crucial for opening ports and need to be followed in the order given.
1. Obtain your Local IP
Local IP addresses are usually assigned to Minecraft servers, so a LAN game can be established. They usually look like 192.168.x.x.
You will need to know your exact Local IP for your PC, otherwise, you will not be able to proceed.
If you are not sure what Local IP is assigned to your computer, simply open the search terminal and type CMD.
Open the Command Prompt, enter “ipconfig”, then press enter. Immediately a screen with different texts will pop up. It will contain your Mac address, Local IP address, and the external address.

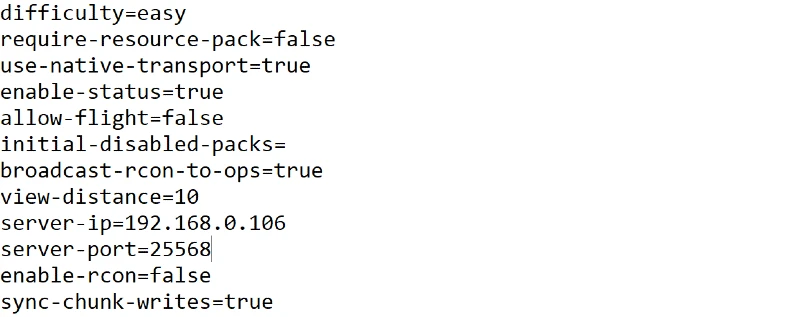
From there we need to take the Local IP address, which holds the name Ipv4.
2. Access your router port-forwarding page
Now that we have the Local IP we need to access our router’s port-forwarding page. To access this page you need to type your local IP in the search bar of your browser.
Once the IP has been written and submitted, you should enter your router’s login page.
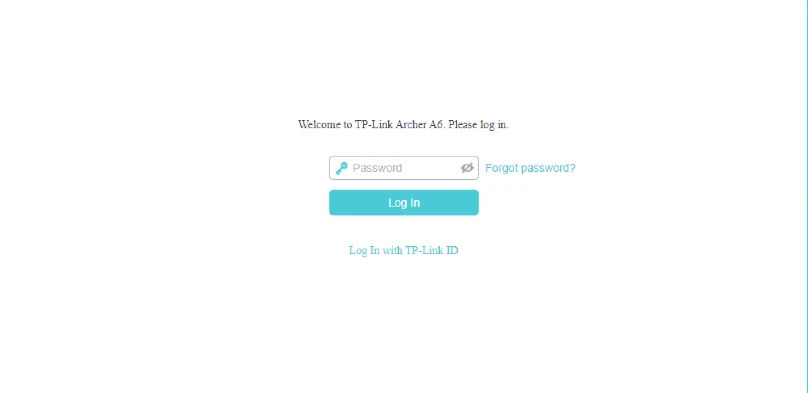
Fill out the username and password to proceed ahead with opening your router’s port. For this tutorial, we are going to use a TP-Link router.
Navigate to the port-forwarding page for TP-Link, and fill out the fields accordingly.
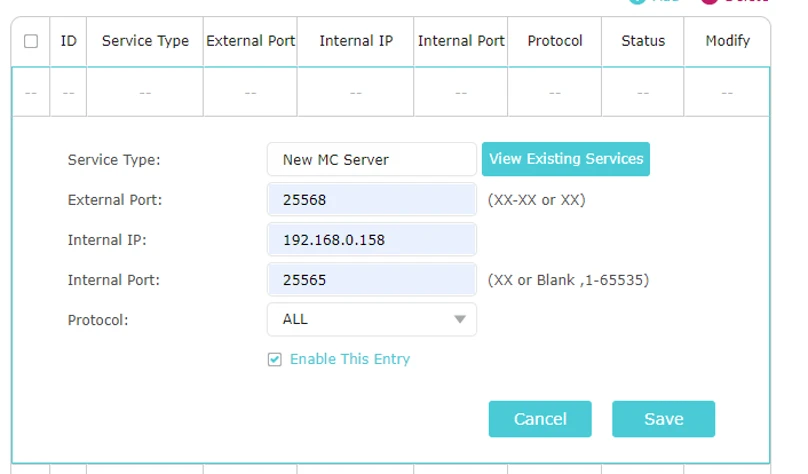
The information should be filled in the following order:
- Service Type: Choose a name for your Minecraft server
- External port: Type the number of the port you wish to open. In our case, it will be 25571
- Internal IP: Write the local IP (Ipv4 address) we have obtained from the command prompt.
- Internal Port: You will need to write the same port as the external one.
- Protocol: Choose all or UDP/TCP together.
If you have filled out this information, you will need to save everything and set rules for your firewall.
3. Allow the Port on your Firewall
To make a Minecraft port work properly, we will need to set a rule in the Firewall.
First, we need to open the Firewall, and choose “Inbound Rules”.
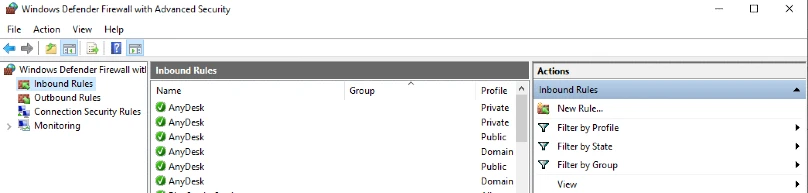
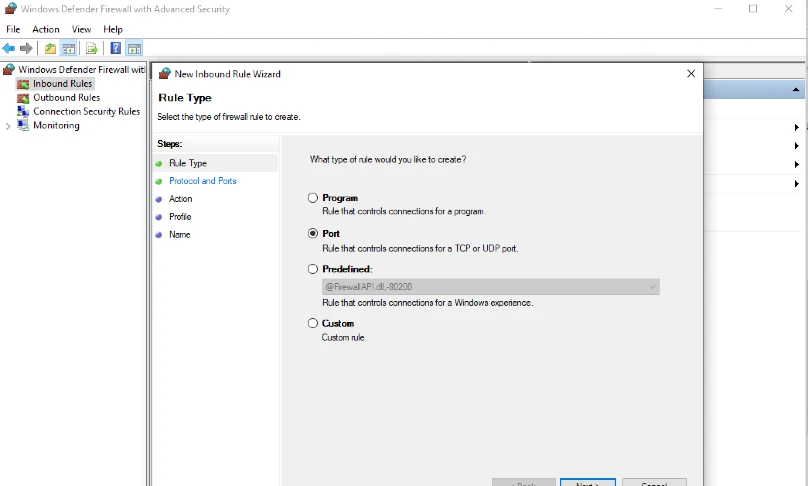
From the list of choices we need to pick “Port”.
Select TCP and enter the port you have already created.
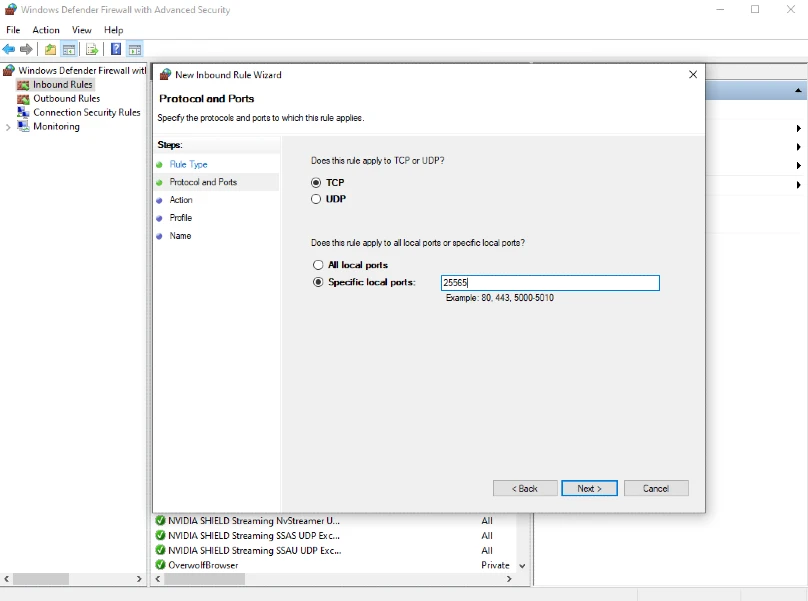
Last, enter the name of your server and type the port in the description field.
Once you have set the Firewall rule for your TCP, re-do these steps, but choose UDP.
How to check if my Minecraft Server port is working
To check if you have successfully opened the ports for your Minecraft server, you can use port-checking tools.
For this tutorial, we are going to use Port Checker. But first, we will need to start the Minecraft server. Head over to your Minecraft server file and start it.
Afterward, open the port checker and type the external IP address. If you don’t know your external IP, you can get it from IPChicken.
The next step is to enter the “Port Number”. This field should have the port you had opened previously.
Finally, you will need to change the “FTP-21” from the dropdown. Select the checker to “Minecraft-25565”.
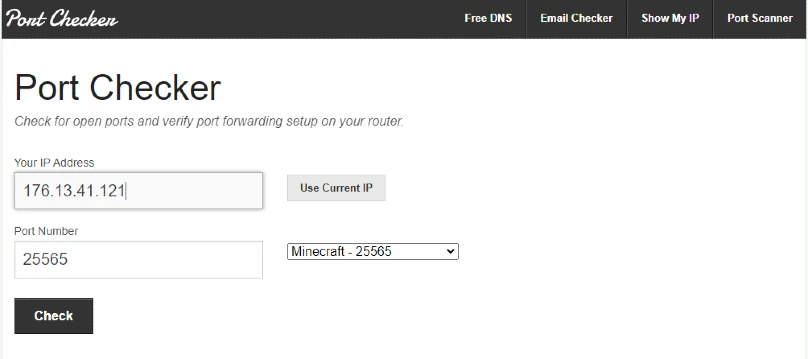
No matter what port you have opened, the Port Checker tool will indicate if your port is indeed open.
The message that you need to see is that your port is marked as open. The best way to trigger this message is by having your Minecraft server active.
In most cases, when your server is offline, the port checker indicates that there is no open port.
Conclusion
Making your local Minecraft server public is a great way to engage with other people. It not only enhances your gameplay better but provides a positive and unique experience.
In this tutorial, we have covered the complete process of how you can open ports on your Minecraft server, and give people access to join.
We have also covered the needed rules for firewalls, where you can allow connections outside your network. With these Firewall rules, you will avoid many server crashes or errors when others are joining.