So you have created multiple Minecraft servers, and want to link them into a network?
Minecraft networks are very popular and can boost the visibility of your servers. Networks also look more professional, as they are not easy to set up or maintain.
In this tutorial, we are going to show you how to make a Minecraft Server Network. To make things easier, we are using Bungeecord for our server network.
What is a Minecraft Server Network
Running multiple linked Minecraft servers under one IP address is considered a server network.
Server networks are usually under one IP address and get masked with a domain name. You may have probably seen Hypixel.
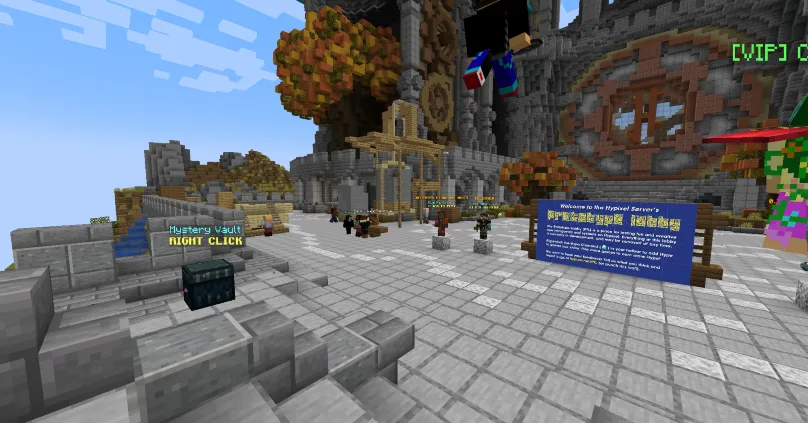
It’s the largest and most popular server network. They offer a wide variety of game modes, including mini-games, survival, and lobby worlds.
It’s a common thing to have a lobby world for your server network. It’s the main hub where players gather and choose where they want to go.
The main benefit is that a player can jump from the lobby to any server without typing anything. All they have to do is choose their preferred server and will get instantly teleported.
Since Minecraft server networks are linked together, transferring between servers with an IP is unnecessary.
Benefits of Server Networks in Minecraft
Starting a Minecraft server network is beneficial for many server owners. It gives a professional image to the team behind the project, but not only.
To help you understand better, we have listed the top benefits of the Minecraft server networks.
Increases income to the server
Server networks have always received more money through donations. They give a professional look and give the feeling that a dedicated team is standing behind the project.
Said with other words, players trust server networks more than singular servers. A server network is more likely to receive large donation amounts across all servers.
Nonetheless, players who remain online on more than one server, make more donations. They love to be ahead of the game, and purchase cosmetics.
More space for upgrades
Having multiple hosting plans is never beneficial. It costs a lot of money, and everything is under a different panel. However, having all your servers together can make upgrading easier and more time-efficient.
Using a single dedicated machine for your network helps you upgrade your plan in a few clicks.
Also, the resource management for each server takes no longer than 5 minutes. If you have different plans, you will need to downgrade one plan and upgrade to another.
This choice would waste your time and money when you could invest it in other projects.
Attracts a wider player base
A Minecraft player loves to have choices for servers. If you offer them one server, they will never be satisfied. It’s a rare sight to find a popular Minecraft server like Wynncraft, but that’s a drop in the ocean.
If you have a server network of 2 or more servers, your player base will be granted a choice. They can easily switch servers and still be a part of your network.
The more server options you offer, the more players will want to stay and not leave.
Easier to manage
When talking about management, it’s not about managing servers separately, but altogether.
Since you have linked all your servers into one big network, managing it is easier. Managing multiple servers separately could seem hard.
We’ve seen server owners manage more than 2 servers under different hosting plans and IP addresses.
Linking all servers together makes resource allocation and management better. Not to mention that players can easily jump between servers without using different IP addresses.
How to make a Minecraft server network
Bungeecord is quite easy to install. It follows the same process as making a Minecraft server. To help you follow the process without mistakes, we have listed each step.
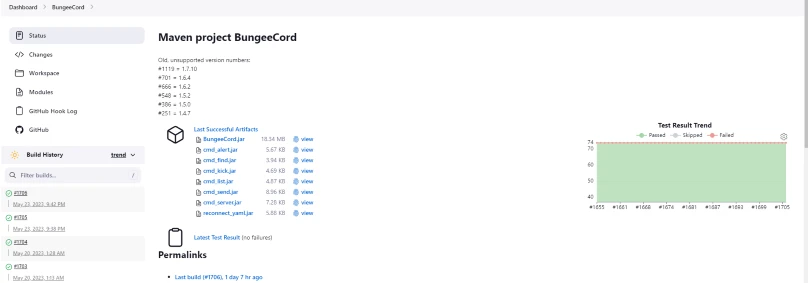
Download Bungeecord
The first thing we need to do is download the latest version of Bungeecord. If you want to set up a Minecraft server with a lower version, download an earlier release.
For downloads, we need to enter the Jenkins website. From there, choose the appropriate version, and save it.
Create a new folder for Bungeecord and give it any name you like.
Create a Bungeecord batch file
The next step is easy to follow and requires you to create a text document. In this document, you need to place the following lines of code.
@echo off
java -Xms512M -Xmx512M -jar BungeeCord.jar
pause

Once the code has been placed, save the file as “run.bat”. For the “save as type”, choose “All Files. After saving the file, we are going to see a new file type in our folder.
Run the Bungecoord batch
Now that we have the installation file, we need to start the process of running the batch file. Double-click the “run.bat” file and wait until the server fully loads.
When loading is finished, you should see a message that your server is loading under a certain port.
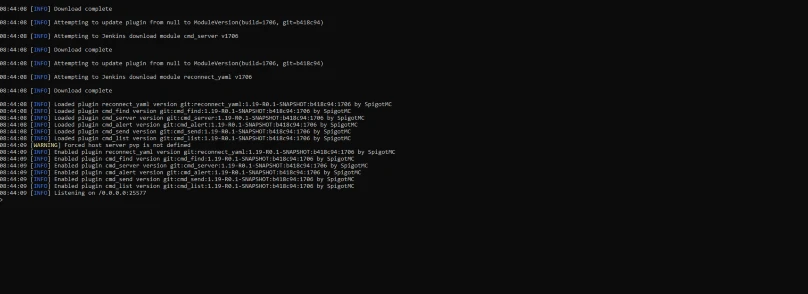
For now, you will not need Bungeecord, so you can write “end” in the console, and press enter. This command will close Bungeecord and will allow you to continue with the settings.
Setting up the Minecraft server Network
To finish setting up your Minecraft server network, you will need to enter the server’s config file.
From there we will see a lot of settings, but for this tutorial, we will change only the important ones.
Online mode – Since we have a network, online mode will need to be set to false.
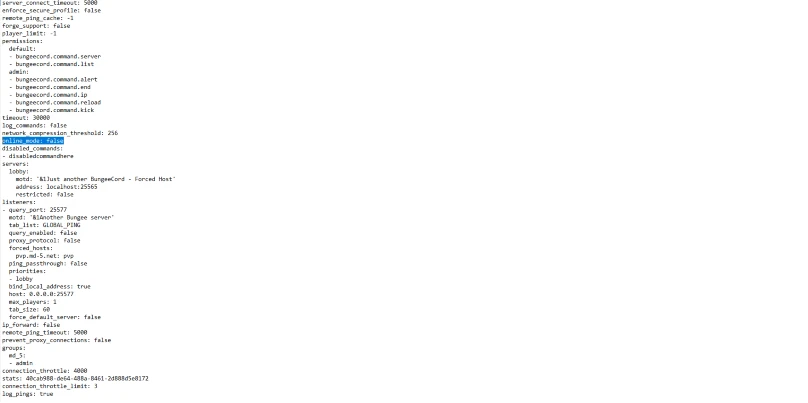
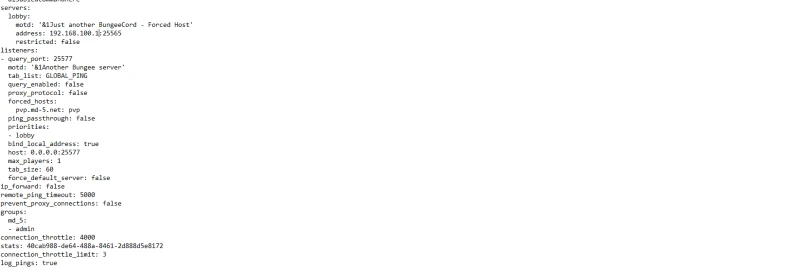
Servers – List all the servers you have by following the same template. The lobby should remain first. Afterward, you will need to add the rest of your servers, by changing the port only.
Max Players – Set the maximum number of players that are allowed to join the lobby.
Force Default Server – You will need to set that to true, otherwise, it will not work.
IP Forward – Set this to true, so players can be transferred to different servers.
Linking server to the Minecraft Server Network
Now that we have added all the settings for Bungeecord, we need to allow them to join the network. For this tutorial, we are going to use Spigot as an example.
Editing the Spigot YML Settings
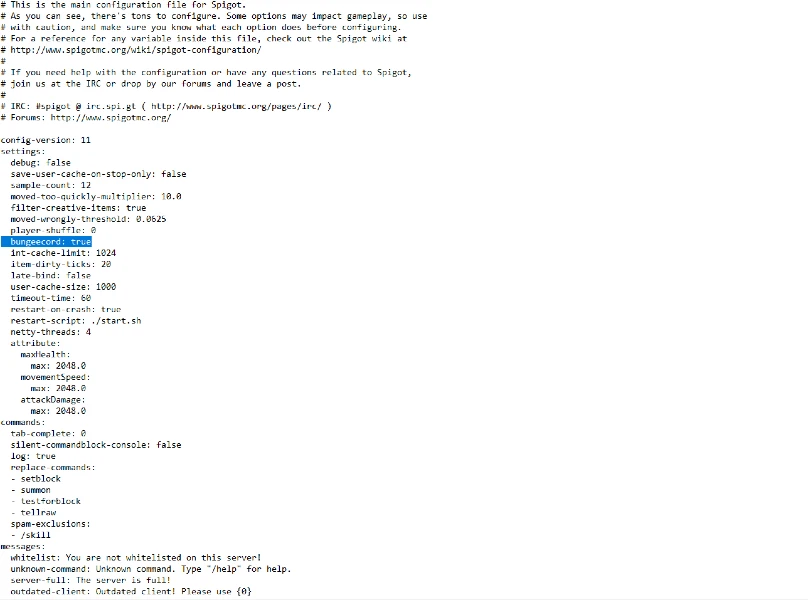
If you have a Spigot Minecraft server, go to the Spigot YML file and locate the Bungeecord setting. It should be located under player-shuffle.
By default “Bungeecord” is set to false. To finish linking the server, we need to set that to true.
Editing the Server Properties Settings
The last thing we need to do is edit the server properties. This is the most important step for the linking. Without it, we will have a Minecraft server network, that we can’t connect to.
The first thing you need to do is open your server properties file and locate the online mode.
Once you find it, you will see it set to true. We need to change it to false. Using offline mode will not harm your computer or give errors.
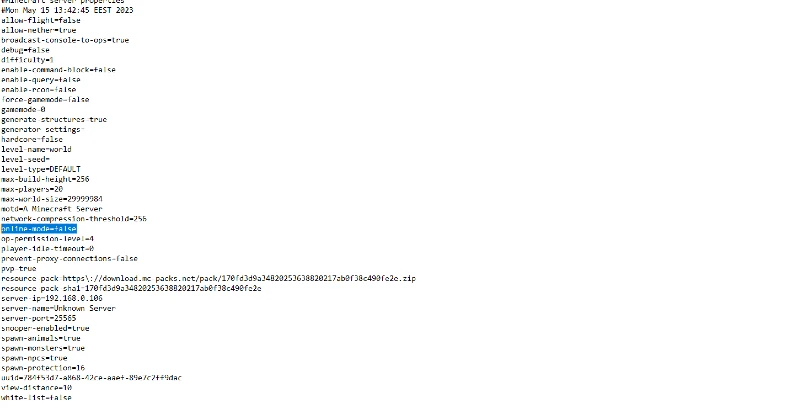
Everything will be safe, but you will need to have extra protections installed to prevent bots.
Conclusion
Now that you know how to make a whole server network in Minecraft, you can try to replicate the steps and increase your income.
Maintaining a server network often requires a support team for each project. While finding that many members are hard, you can always start with 2 servers and 1 lobby.
It’s an easier start and will help you get a grasp of how to maintain your Minecraft server network.